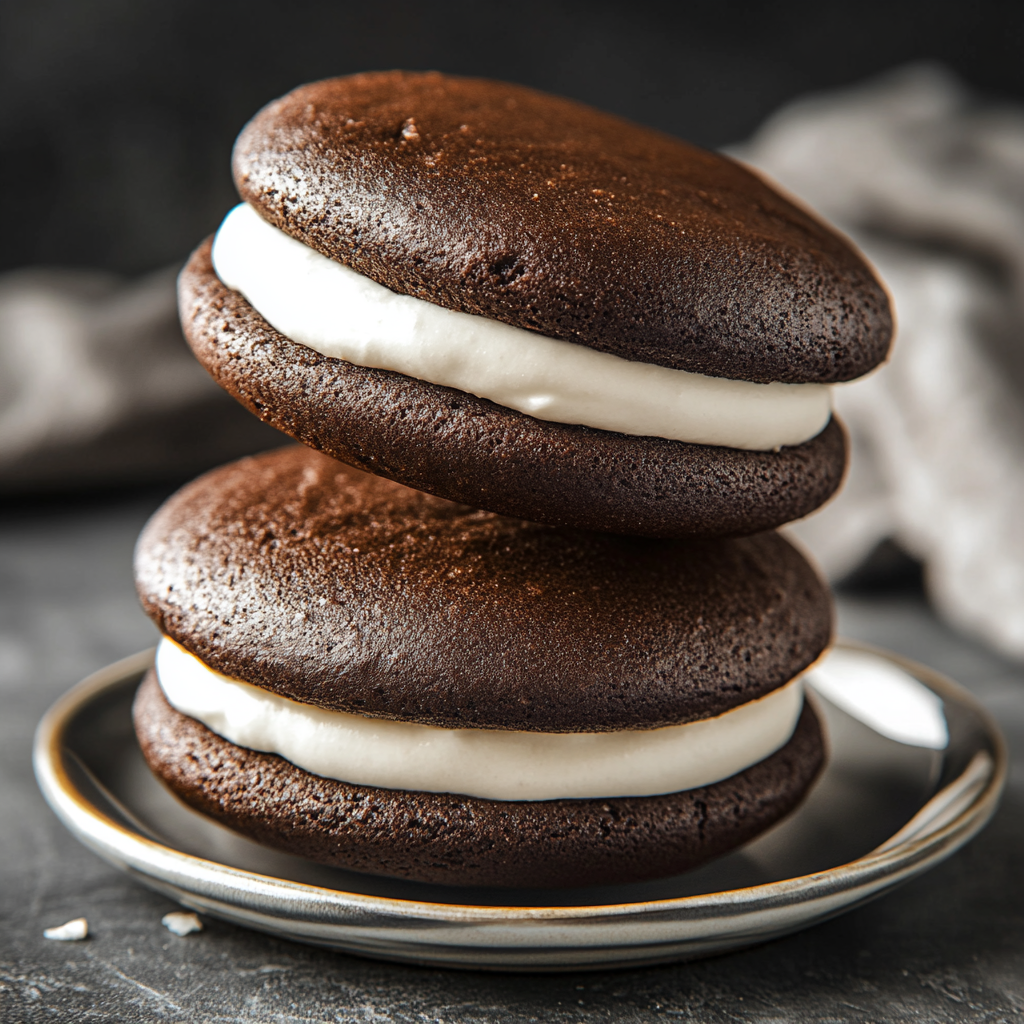
Whoopie pies are the ultimate combination of cake and cookie, and they are the perfect treat for any occasion. With a soft, fluffy cake-like exterior and a rich, creamy filling sandwiched in between, these handheld desserts are as fun to make as they are to eat. The combination of chocolate or vanilla cake with marshmallow or buttercream filling creates a mouthwatering dessert that everyone loves.
In this recipe, we will walk you through the process of making classic whoopie pies from scratch. You’ll learn how to make soft, cake-like cookie rounds and fill them with a fluffy marshmallow filling, just like the classic version from the Northeast. Let’s get started!
Ingredients:
For the Whoopie Pies (Cake Rounds):
- 2 1/2 cups all-purpose flour
- 1 teaspoon baking powder
- 1 teaspoon baking soda
- 1/2 teaspoon salt
- 1/2 cup unsweetened cocoa powder (for chocolate whoopie pies, or use all-purpose flour for vanilla)
- 1/2 cup unsalted butter, softened
- 1 cup granulated sugar
- 1 large egg
- 1 teaspoon vanilla extract
- 1 cup whole milk
- 1/2 cup hot water (for chocolate whoopie pies)
- 1/2 cup sour cream or buttermilk (optional, for added tenderness and flavor)
For the Marshmallow Filling:
- 1/2 cup unsalted butter, softened
- 1 cup marshmallow fluff (or marshmallow cream)
- 1 cup powdered sugar
- 1 teaspoon vanilla extract
- Pinch of salt
- 1-2 tablespoons milk (if needed for consistency)
Instructions:
Step 1: Make the Whoopie Pie Cake Rounds
- Preheat the Oven: Preheat your oven to 375°F (190°C). Line two baking sheets with parchment paper or silicone baking mats to prevent the whoopie pies from sticking.
- Mix the Dry Ingredients: In a medium bowl, whisk together the all-purpose flour, baking powder, baking soda, salt, and cocoa powder (if making chocolate whoopie pies). Set the dry ingredients aside.
- Cream the Butter and Sugar: In a large mixing bowl, cream together the softened butter and granulated sugar using an electric mixer on medium speed. Beat for about 3-4 minutes until the mixture becomes light and fluffy.
- Add the Egg and Vanilla: Add the egg and vanilla extract to the butter-sugar mixture. Beat until fully incorporated.
- Alternate Adding Dry Ingredients and Wet Ingredients: Gradually add the dry ingredients to the wet ingredients in three parts, alternating with the addition of the milk. Start by adding 1/3 of the dry ingredients, followed by half of the milk, then add another 1/3 of the dry ingredients, followed by the rest of the milk. Finish by adding the final third of the dry ingredients and mix until just combined. This method helps keep the batter smooth and ensures an even texture.
- Add Hot Water (for Chocolate Whoopie Pies): If you are making chocolate whoopie pies, add the hot water to the batter and mix until it is well incorporated. The batter will be slightly runny, but this is normal and helps create a soft, moist texture.
- Scoop the Batter: Use a spoon, ice cream scoop, or a piping bag to drop tablespoon-sized amounts of batter onto the prepared baking sheets. Space the scoops about 2 inches apart to allow the cookies to spread slightly during baking. If you prefer perfectly round whoopie pies, you can use a round cookie cutter to shape them after they’ve baked.
- Bake the Whoopie Pies: Bake the whoopie pies in the preheated oven for 8-10 minutes, or until a toothpick inserted into the center comes out clean. Keep an eye on them to avoid overbaking, as they should remain soft and cake-like.
- Cool the Whoopie Pies: Allow the whoopie pies to cool on the baking sheets for 5 minutes before transferring them to a wire rack to cool completely. The pies need to be completely cool before adding the filling.
Step 2: Make the Marshmallow Filling
- Cream the Butter: In a medium bowl, beat the softened butter until smooth and creamy. You can use an electric mixer for this step to ensure the butter becomes light and fluffy.
- Add the Marshmallow Fluff: Add the marshmallow fluff (or marshmallow cream) to the butter and beat until fully combined. The fluff will add sweetness and a light, airy texture to the filling.
- Add Powdered Sugar: Gradually add the powdered sugar to the butter-marshmallow mixture, 1/4 cup at a time, mixing well after each addition. Continue beating until the mixture becomes smooth and creamy.
- Add Vanilla and Salt: Stir in the vanilla extract and a pinch of salt. The salt helps balance the sweetness of the filling and enhances the flavor.
- Adjust Consistency: If the filling is too thick, add 1 tablespoon of milk at a time until you reach a smooth, spreadable consistency. You want the filling to be thick enough to hold its shape but smooth enough to spread easily.
Step 3: Assemble the Whoopie Pies
- Pair Up the Cookies: Once the whoopie pie cakes have completely cooled, pair them up based on size so you have matching halves to form the sandwich.
- Add the Filling: Using a spoon or a piping bag, spread a generous amount of marshmallow filling onto the flat side of one of the whoopie pie cakes. Be sure to leave a small border around the edge to prevent the filling from spilling out when you press the halves together.
- Sandwich the Pies: Place the matching whoopie pie half on top of the filling, pressing gently to spread the filling evenly to the edges.
- Repeat the Process: Continue the process with the remaining whoopie pies until all of them are filled and assembled.
Step 4: Serve and Enjoy!
- Serve: Serve the whoopie pies immediately, or store them in an airtight container at room temperature for up to 2-3 days. You can also refrigerate them if you prefer a firmer filling.
- Optional Decorating: For a fun and festive touch, roll the edges of the whoopie pies in sprinkles, mini chocolate chips, or shredded coconut before serving.
Tips for the Perfect Whoopie Pies
- Sift the Dry Ingredients: To avoid lumps and ensure an even batter, always sift the flour, cocoa powder, and baking powder before mixing them with the wet ingredients. This will create a smoother batter and lighter texture in your whoopie pies.
- Use Room Temperature Ingredients: To ensure the batter comes together smoothly, make sure that your butter, eggs, and milk are at room temperature before starting. Cold ingredients can cause the batter to be lumpy or difficult to mix.
- Don’t Overbake: Whoopie pies are meant to have a soft, cake-like texture. Be sure not to overbake them, as this will cause them to become dry and crumbly. The toothpick test should come out clean, but the whoopie pies should still be soft to the touch.
- Use a Piping Bag for Filling: If you want a clean, neat filling in your whoopie pies, use a piping bag fitted with a round tip. This allows you to control the amount of filling and creates a smooth, even layer.
- Customize the Flavor: While classic whoopie pies are typically made with chocolate cake and marshmallow filling, you can experiment with different flavors. Try using vanilla cake with a buttercream filling or even add a layer of fruit preserves for a twist.
- Make Mini Whoopie Pies: For smaller, bite-sized treats, you can scoop smaller portions of batter onto the baking sheets and create mini whoopie pies. These are perfect for parties, gatherings, or a sweet snack.
Variations and Customizations
- Chocolate and Peanut Butter Whoopie Pies: For a rich variation, add creamy peanut butter to the filling. This combination of chocolate cake with peanut butter filling is a fan favorite. Simply replace half the butter in the filling with peanut butter for a peanut buttery twist.
- Pumpkin Spice Whoopie Pies: For a fall-inspired version, swap out the cocoa powder in the whoopie pie batter for pumpkin puree and spices like cinnamon, nutmeg, and cloves. This variation pairs wonderfully with a cream cheese filling.
- Vegan Whoopie Pies: To make this recipe vegan, substitute the butter with a dairy-free margarine or coconut oil, the egg with a flax egg (1 tablespoon ground flaxseed mixed with 3 tablespoons water), and use plant-based milk such as almond or oat milk. You can also use a vegan marshmallow cream in place of the marshmallow fluff.
- Gluten-Free Whoopie Pies: For a gluten-free version, simply swap the all-purpose flour with a 1:1 gluten-free flour blend. Be sure that the marshmallow fluff and other ingredients are also gluten-free.
Storing and Freezing Whoopie Pies
- Room Temperature Storage: Store any leftover whoopie pies in an airtight container at room temperature for up to 2-3 days. They are best enjoyed fresh, but they will stay soft and delicious for a few days.
- Refrigeration: If you want the filling to firm up, you can refrigerate the whoopie pies for 1-2 hours before serving. This also helps the flavors meld together.
- Freezing Whoopie Pies: Whoopie pies freeze wonderfully. To freeze, assemble the pies and wrap them individually in plastic wrap. Place them in a freezer-safe container or zip-top bag. Freeze for up to 2 months. When ready to eat, thaw at room temperature for a few hours.
Final Thoughts
Classic whoopie pies are the perfect nostalgic treat that combines the best elements of cake and cookies in one delicious bite. Whether you stick to the traditional chocolate and marshmallow filling or experiment with new flavors and fillings, this recipe is sure to please. With a light, soft texture and a creamy, sweet filling, whoopie pies are the perfect dessert for any occasion.
Enjoy making, sharing, and indulging in these delightful treats!