Chocolate cream pie is the perfect dessert for any occasion—whether it’s a holiday, a family gathering, or a cozy evening. With a rich, velvety chocolate filling nestled in a buttery, flaky pie crust and topped with fluffy whipped cream, this dessert is an irresistible combination of textures and flavors. It’s simple to make but looks and tastes like a showstopper!
In this recipe, we will guide you step-by-step on how to make the best classic chocolate cream pie from scratch. From the buttery crust to the silky chocolate filling and freshly whipped cream topping, this pie is sure to impress.
Ingredients:
For the Pie Crust:
- 1 1/4 cups all-purpose flour
- 1/4 teaspoon salt
- 1/4 teaspoon sugar
- 1/2 cup unsalted butter, cold and cubed
- 1/4 cup ice water (plus more as needed)
For the Chocolate Cream Filling:
- 2 1/2 cups whole milk
- 1/2 cup heavy cream
- 1 cup granulated sugar
- 1/3 cup unsweetened cocoa powder
- 1/4 teaspoon salt
- 4 large egg yolks
- 1 tablespoon cornstarch
- 2 tablespoons unsalted butter
- 1 teaspoon vanilla extract
- 6 ounces semisweet or bittersweet chocolate, finely chopped
For the Whipped Cream Topping:
- 1 cup heavy cream
- 2 tablespoons powdered sugar
- 1/2 teaspoon vanilla extract
- Chocolate shavings or cocoa powder (for garnish)
Instructions:
Step 1: Make the Pie Crust
- Combine Dry Ingredients: In a large mixing bowl, whisk together the flour, salt, and sugar. This will be the base for your crust.
- Cut in the Butter: Add the cold, cubed butter to the dry ingredients. Use a pastry cutter, two forks, or your hands to work the butter into the flour mixture until it resembles coarse crumbs. The pieces of butter should be pea-sized.
- Add Ice Water: Slowly add the ice water, one tablespoon at a time, mixing gently with a fork after each addition. Continue adding water until the dough begins to form and holds together when pressed. Be careful not to add too much water—just enough to bring the dough together.
- Chill the Dough: Turn the dough out onto a lightly floured surface and form it into a disk. Wrap it in plastic wrap and refrigerate for at least 1 hour (or up to 2 days). Chilling the dough will help prevent it from shrinking while baking.
- Roll and Fit the Dough: After chilling, remove the dough from the refrigerator and roll it out on a floured surface to about 1/8-inch thickness. Gently fit the dough into a 9-inch pie dish, trimming any excess dough around the edges. Use your fingers to crimp the edges for a decorative finish.
- Pre-bake the Crust: Preheat your oven to 375°F (190°C). Place a sheet of parchment paper or aluminum foil over the crust and fill it with pie weights or dried beans. Bake the crust for 15 minutes. Then, remove the weights and parchment/foil and bake for an additional 5-7 minutes, or until the crust is golden brown. Set aside to cool completely.
Step 2: Make the Chocolate Cream Filling
- Heat the Milk and Cream: In a medium saucepan, combine the whole milk and heavy cream. Heat over medium heat, stirring occasionally, until the mixture is warm but not boiling.
- Whisk the Dry Ingredients: In a separate bowl, whisk together the sugar, cocoa powder, and salt. In another bowl, whisk the egg yolks and cornstarch until smooth.
- Temper the Egg Yolks: Slowly pour a small amount of the warm milk mixture into the egg yolks, whisking constantly to temper them (this helps prevent the yolks from curdling). Gradually add the egg yolk mixture into the saucepan with the remaining milk mixture, whisking constantly.
- Cook the Filling: Continue to cook the mixture over medium heat, whisking constantly, until it thickens and comes to a gentle boil. This should take about 5-7 minutes. Once thickened, reduce the heat to low and cook for an additional 1-2 minutes.
- Add Butter, Chocolate, and Vanilla: Remove the saucepan from the heat. Stir in the butter, chopped chocolate, and vanilla extract. Continue stirring until the chocolate is melted and the mixture is smooth and glossy.
- Cool the Filling: Pour the chocolate filling into the prepared pie crust. Smooth the top with a spatula. Cover the pie with plastic wrap, making sure the wrap touches the surface of the filling to prevent a skin from forming. Refrigerate for at least 4 hours or until the filling is set. For the best results, chill overnight.
Step 3: Make the Whipped Cream Topping
- Whip the Cream: In a chilled mixing bowl, beat the heavy cream with an electric mixer on medium-high speed until it begins to thicken.
- Add Sugar and Vanilla: Once the cream starts to thicken, add the powdered sugar and vanilla extract. Continue beating until stiff peaks form.
- Top the Pie: Once the chocolate filling has set, remove the pie from the refrigerator. Spread the whipped cream evenly over the top of the chocolate filling.
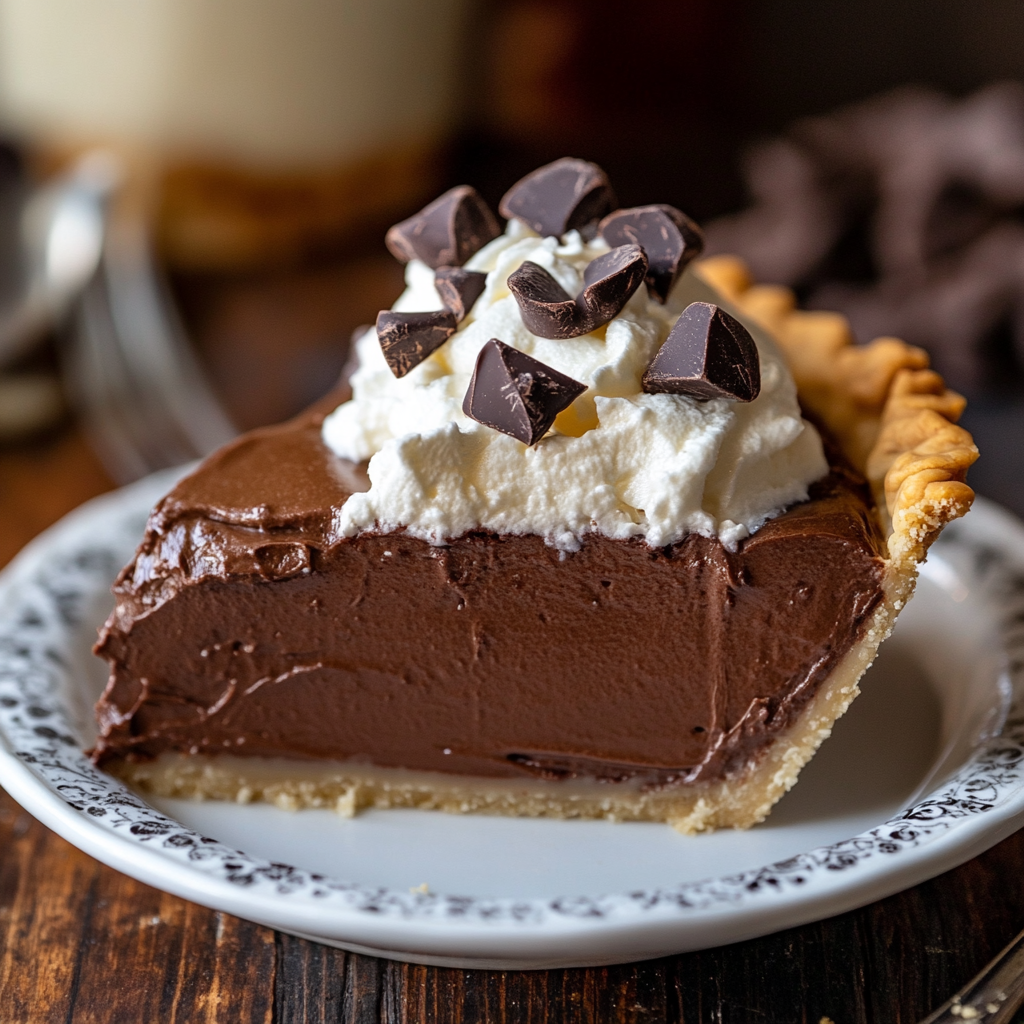
- Garnish: For an extra touch, garnish the pie with chocolate shavings, cocoa powder, or grated chocolate. This adds a beautiful visual element and extra chocolatey goodness.
Step 4: Serve and Enjoy!
- Slice and Serve: To slice the pie, use a sharp knife dipped in warm water, wiping it clean between each cut for clean slices. Serve chilled.
- Optional: For an extra special treat, serve the pie with a drizzle of chocolate sauce or a sprinkle of crushed nuts for added texture.
Tips for the Best Chocolate Cream Pie
- Use High-Quality Chocolate: Since the filling relies heavily on the chocolate flavor, using high-quality chocolate makes a noticeable difference. Opt for semisweet or bittersweet chocolate for a rich, balanced flavor.
- Chill the Pie for Best Texture: The longer you chill the pie, the firmer and more set the filling will become. This is essential for getting that smooth, creamy texture that melts in your mouth.
- Don’t Skip the Whipped Cream: The whipped cream topping is a crucial component of this dessert. It balances out the richness of the chocolate and adds a light, airy contrast. Freshly whipped cream is a must!
- Make It Ahead: This pie is perfect for making ahead. It can be prepared the day before your event, giving the filling plenty of time to set and develop its flavors. Just keep it covered in the refrigerator.
Healthier Variations (Optional)
- Lighter Crust: For a lighter version of the crust, you can use a graham cracker crust or a store-bought pie crust. These alternatives can save you time and reduce calories while still providing a great base for the filling.
- Dairy-Free Version: To make this pie dairy-free, substitute the whole milk and heavy cream with coconut milk or almond milk. You can also use dairy-free butter and chocolate. Be sure to check the labels to ensure they are free of any hidden dairy ingredients.
- Sugar-Free Option: For those looking to reduce sugar intake, you can use a sugar substitute like stevia or erythritol in place of granulated sugar. However, be mindful that this may slightly alter the taste and texture of the filling.
Storing the Pie
To store the pie, cover it with plastic wrap or aluminum foil and refrigerate. It will stay fresh for up to 3 days. If you need to freeze the pie, wrap it tightly in plastic wrap and foil before freezing. To thaw, leave it in the refrigerator for a few hours before serving.
Final Thoughts
Classic chocolate cream pie is a dessert that never goes out of style. With its decadent chocolate filling, buttery crust, and whipped cream topping, it’s a crowd-pleaser that’s perfect for any occasion. By following these steps, you’ll be able to make this rich, indulgent dessert at home and impress your guests or treat yourself to a comforting slice of homemade heaven. Whether you’re a seasoned baker or a beginner, this recipe is sure to become a favorite in your dessert repertoire. Enjoy!